Peek Into Packet
Owning a home network may not be at that Risk, but if you are a security enthusiast and own a Raspberry Pi, it’s worth implementing the NIDS and observing the suspicious/malicious network communication.
So, What is NIDS? 📖
Well, Wiki has a better answer 😁. Will use Suricata for NIDS and integrate it with Wazuh for visibility. If you don’t have Wazuh setup, you can skip this part.
Requirements:
- RPi with 16 GB Memory Card (4 Core, 1 GB RAM)
- Network Switch with Port Mirroring (not required for test)
- Wazuh Setup (Optional)
Prepare RPi3
I used Pi Imager to install the Raspbian OS, other option are also available balenaEtcher; After selecting the device, Choose OS>Raspberry Pi OS (other)>Raspberry Pi OS Lite (64-bit) and click on the gear button to customize hostname, user, and credentials.
Connect the RPi to your network, find its IP using gateway UI, and SSH into, using the above-configured user and password, and update the repository.
1
apt update && apt upgrade
Install & Configure Suricata
Search if the package is available for ARM build, you will see the package availability, version, and dependency. (execute the command as sudo privilege)
1
apt info suricata -y
Install the package and enable the suricata service
1
2
apt install suricate
systemctl enable suricata
Configure the suricata.yaml using nano or vi
1
nano /etc/suricata/suricata.yaml
Change the following, Home_Network_IP_Range is the network range you have defined, 10.0.0.0/8 or 172.16.0.0/16 or 192.168.0.0/24 or any other custom range. Interface_Name, on which it will inspect the network packets, by default raspbian interface starts with eth*, you can find it by ifconfig or ip addr.
1
2
HOME_NET:"[10.0.0./24]"
interface: eth01
Now, restart the service and check the status
1
systemctl restart suricata && systemctl status suricata
Load the rules, it will take some time to complete, depending on the size of the rules
1
2
systemctl stop suricata
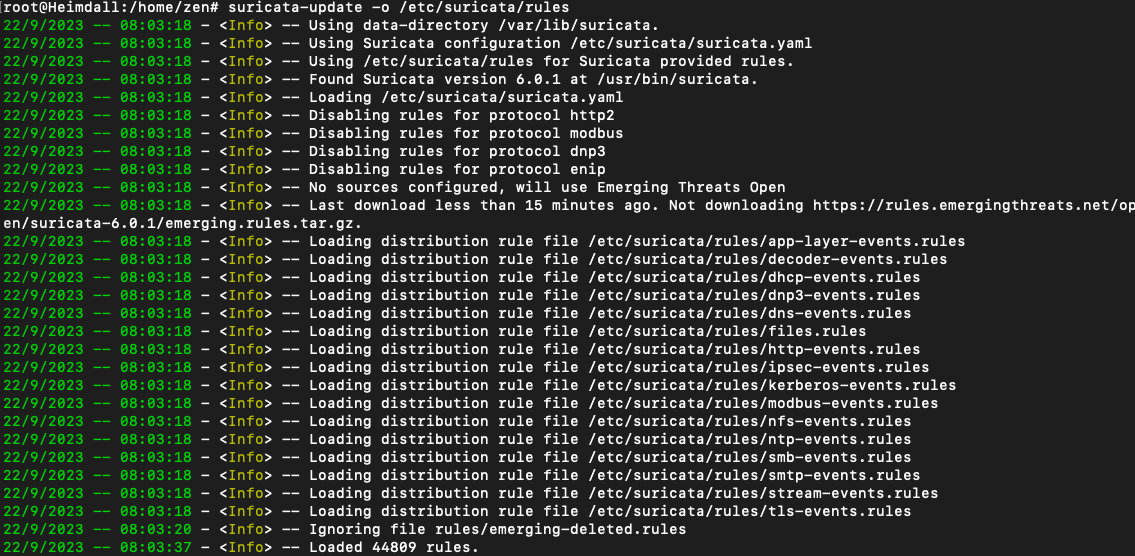
suricata-update -o /etc/suricata/rules
After loading the rules, test the rules. It will provide information about how many rules were loaded and how many failed.
1
2
suricata -v -T -c /etc/suricata/suricata.yml
systemctl start suricate
-v: Verbose, -T: Test, -c: Configuration
Trigger the Alerts
nslookup command is not installed by default. For test purposes, execute the command directly on IPS, because I’m still waiting for Switch (with Port Mirror) to be delivered.
1
apt install dnsutils
Then execute the following command
1
2
nslookup 3wzn5p2yiumh7akj.onion
curl http://testmynids.org/uid/index.html
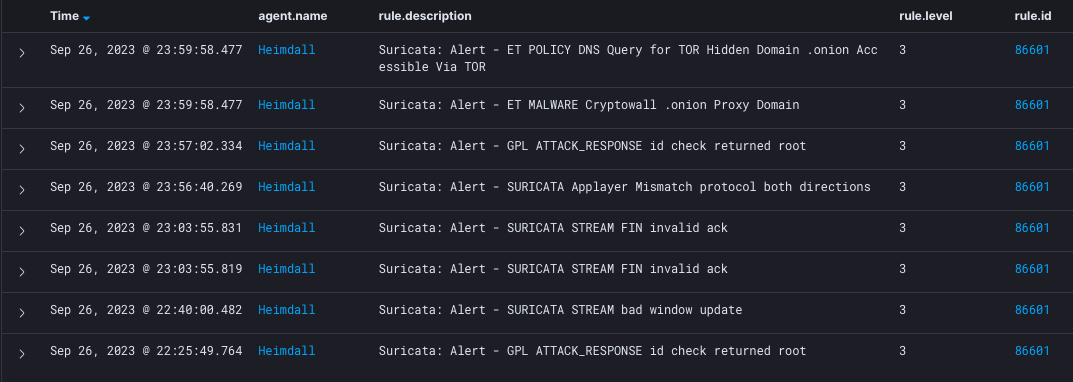
Check the logs, you will see the alerts related to the above detection
1
tail /var/log/suricata/fast.log
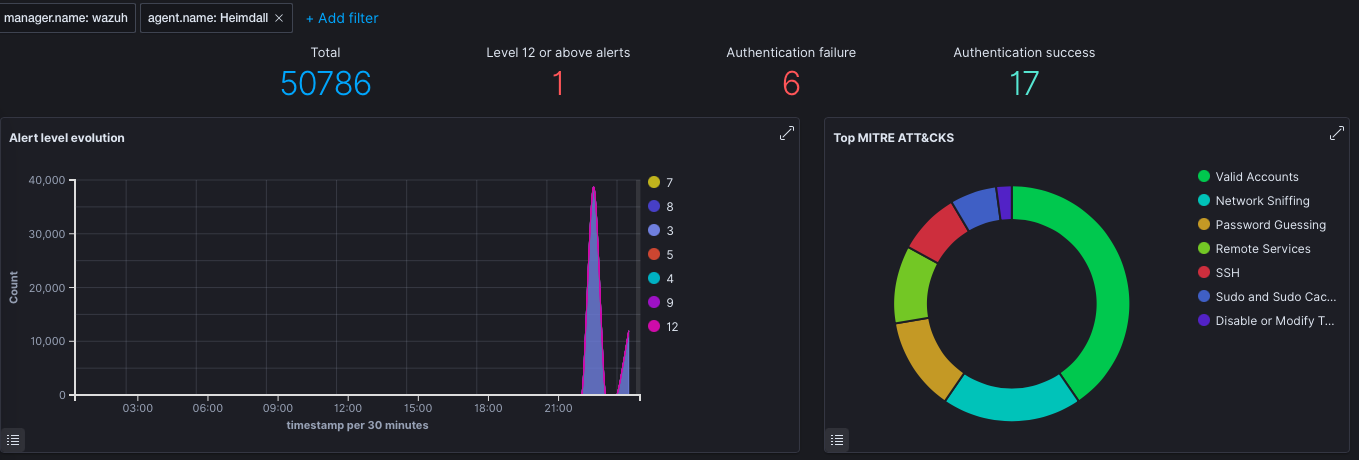
If Wazuh is available, you can see the Alerts
DOS Attack
1
hping3 -S --flood -V -p 8000 <IDS_IP>
Install Wazuh Agent (Optional)
If you have Wazuh server already setup, you can configure the Wazuh Agent on NIDS and pull the detection logs to Wazuh for visibility and alert’s information.
Install the GPG key:
1
curl -s https://packages.wazuh.com/key/GPG-KEY-WAZUH | gpg --no-default-keyring --keyring gnupg-ring:/usr/share/keyrings/wazuh.gpg --import && chmod 644 /usr/share/keyrings/wazuh.gpg
Add the repository:
1
echo "deb [signed-by=/usr/share/keyrings/wazuh.gpg] https://packages.wazuh.com/4.x/apt/ stable main" | tee -a /etc/apt/sources.list.d/wazuh.list
Update the package and install the Wazuh agent with the Wazuh server IP
1
2
apt update
WAZUH_MANAGER="10.0.0.20" apt install wazuh-agent
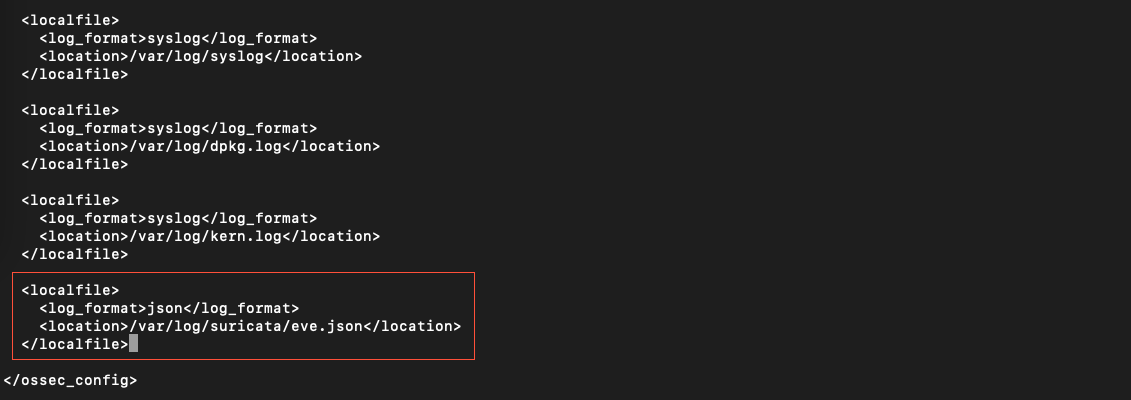
Configure the ossec.conf on this and append the below config
1
nano /var/ossec/etc/ossec.conf
1
2
3
4
<localfile>
  <log_format>json</log_format>
  <location>/var/log/suricata/eve.json</location>
</localfile>
Also change the “File Integrity” disabled value from no to yes, since it will create a lot of unnecessary alerts for FIM
Enable and start the Wazuh service and verify the service
1
2
3
4
systemctl daemon-reload
systemctl enable wazuh-agent
systemctl start wazuh-agent
systemctl status wazuh-agent
Active response
By default suricata work as IDS. There are two ways to respond to threats, either use in IPS mode or via Wazuh response.
Then there is the performance
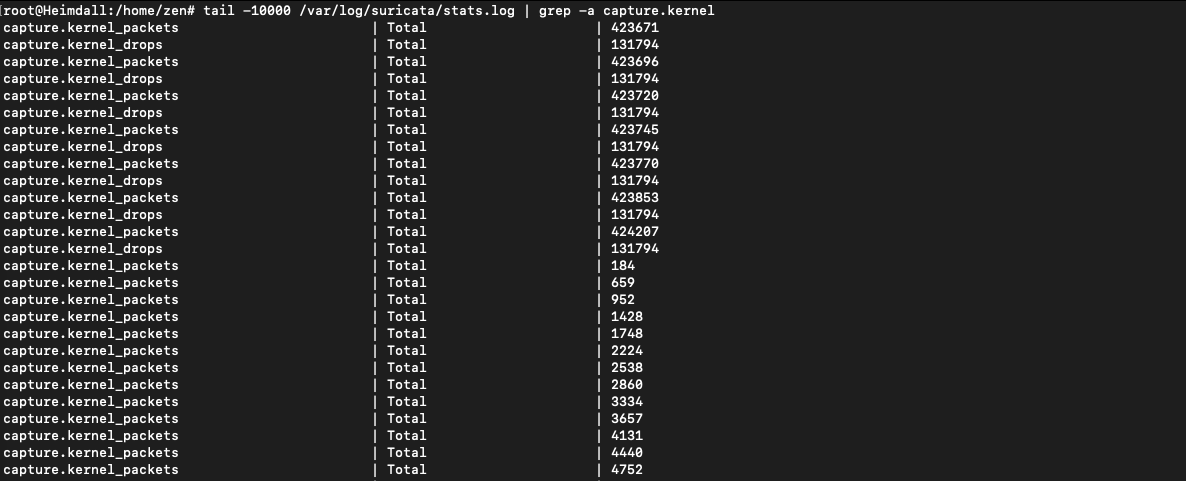
Since RPi is low performance computer, you will see some packet drops, though it’s tuneable.
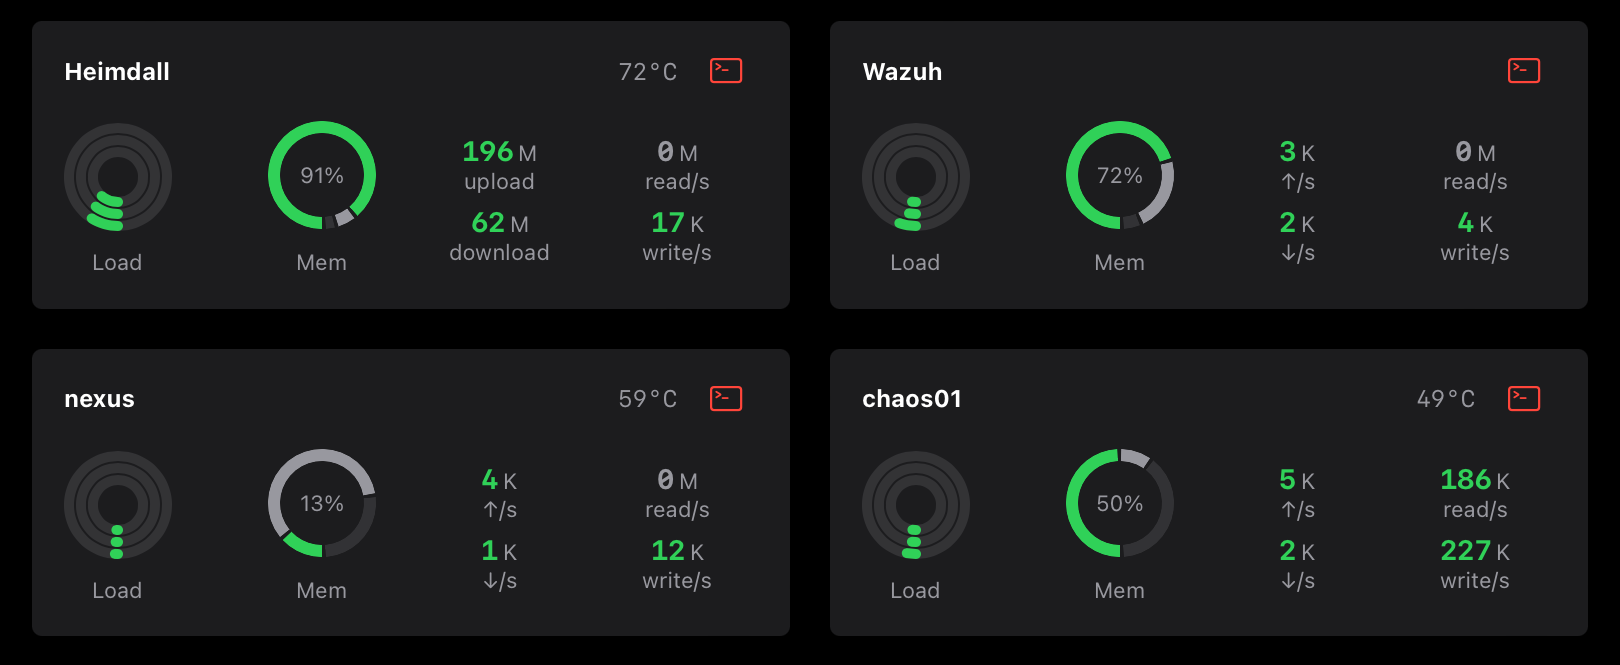
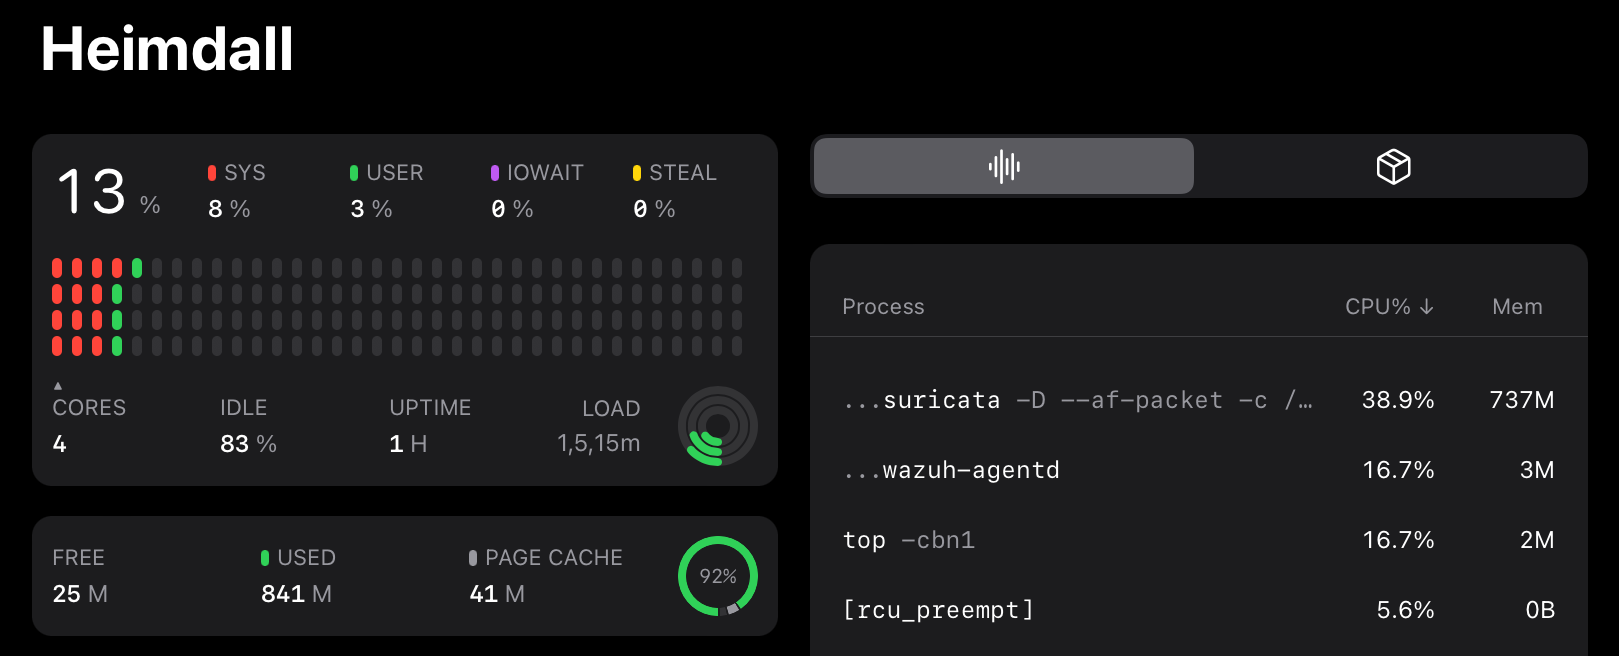
These are the system performance, you can see the RAM is almost full, and even the temperature of the CPU is High. Through RPi4 we can get better performance since it has higher RAM. To get exact performance metrics, lots of testing is required with multiple parameters.
Detection Rules
By default, Suricata is configured as extended for DNS and TLS packets, which means these packets will work in support of network packets, we can enable this to work alone. There are a plethora of open/paid rule sets to detect the threat and we can also configure to auto-update the rules as per trends.
Rule fine-tuning is another aspect, where we can reduce the noise and unwanted alerts.
Since performance tuning is itself a big task, I haven’t included it in this article.


